

Horsea! Sea horses are summery, right? This pattern utilizes a technique where you interrupt your round of single crochet to chain and skip stitches...leaving a hole that you come back to later to finish crocheting. It means less sewing and a more seamless look. It might be confusing to beginners, but really, it's not an exact science. As long as you have the determined amount of stitches in the hole you made, it'll turn out fine. Alternatively, you COULD make a bunch of pieces and sew them on and it would be fine.

There will be quite a bit of color changing for the body. I simply stranded/carried the yarn over vice cutting/knotting since it was such a short distance.
Final note: I am using a thinner blue, baby yarn. If you are using typical weight acrylic yarn, Horsea will be a touch bigger.
--
This pattern is written, created, published, and illustrated by The Craftzilla. Please do not sell, copy or redistribute this pattern or any parts therein (share the blog page link instead!) You may sell final creations, but please do not claim the pattern as your own. Thank you!
Materials:
Size E 3.5 mm hook
Baby blue yarn
Light yellow yarn
Yarn needle
Scissors
Size 7 oval safety eyes (or felt or what have you)
Terms/Abbreviations (US):
Ch -- Chain
Mc – Magic circle
Sl st – Slip stitch
Sc – Single crochet
Hdc – Half double crochet
Dc – Double crochet
Inc – Increase, place two sc in one stitch
Dec- Decrease, I use invisible dec, but essentially make one sc over two stitches
*---* signals a set of stitches to be repeated
(_) indicates how many stitches should be in that round
Head
Make one in baby blue
Round 1: 6 sc in mc (6)
R2: Inc every stitch (12)
R3: *Inc, sc* six times (18)
R3: *Inc, sc* six times (18)
R4: *Inc, sc, sc* six times (24)
R5-6: Sc around (24)
R7: Ch 3, skip three full stitches, then sc into the fourth. Sc 8 more, then ch 3, skip 3 again. Sc 9. (6 ch, 18 sc)
R8: Ch 3, skip three full stitches, then sc into the fourth. Sc 8 more, then ch 3, skip 3 again. Sc 9. (6 ch, 18 sc)
R9: Ch 3, skip three full stitches, then sc into the fourth. Sc 2 more, then ch 3, skip 3 again. Sc 3, ch 3, skip 3, sc 9 (9 ch, 15 sc)

--Snap your safety eyes in place in between rows 8 and 9 about 4 stitches apart, on either side of the hole made for the snout--
R10: *Dec, sc, sc* six times. Treat each chain as a stitch now, be sure to sc into the chain rather than over it. (18)
--Begin stuffing the head--
R11: *Dec, sc* six times (12)
--Do not cut yarn or fasten off, go straight into making the body and tail.--
--Do not cut yarn or fasten off, go straight into making the body and tail.--
Body/Tail
Using baby blue and light yellow yarn
R1: 3 blue sc, 3 yellow sc, 6 blue sc (12)
R2: 3 blue sc, inc yellow, inc yellow, inc yellow, 3 blue sc, inc blue, 2 blue sc (16)
R3: 3 blue sc, 6 yellow sc, 4 blue sc, inc blue, 2 blue sc (17)
R4: 3 blue sc, 6 yellow sc, 7 blue sc, inc blue (18)
R5: 3 blue sc, 3 yellow sc, inc yellow, 2 yellow sc, 9 blue sc (19)
R6: 3 blue sc, 7 yellow sc, 9 blue sc (19)
R7: 3 blue sc, 1 yellow sc, dec yellow, 1 yellow sc, dec yellow, 1 yellow sc, 2 blue sc, dec blue, 2 blue sc, dec blue, 1 blue sc (15)
R8: 3 blue sc, 1 yellow sc, dec yellow, dec yellow, 2 blue sc, dec blue, dec blue, 1 blue sc (11)
--Stuff the body, cut and knot yellow yarn, we are now working on the tail in only baby blue--
R9-12: Sc blue around (11)
R13: Dec, sc 9 (10)
R14: Dec, sc 8 (9)
R15-18: Sc around (9)
R19: Dec, dec, dec, dec, sc
Cut and weave yarn ends to close opening.
(Planet June has the best tutorial on how to do this: http://www.planetjune.com/blog/the-ultimate-finish-for-amigurumi/)
R19: Dec, dec, dec, dec, sc
Cut and weave yarn ends to close opening.
(Planet June has the best tutorial on how to do this: http://www.planetjune.com/blog/the-ultimate-finish-for-amigurumi/)
Roll the tail up and secure by sewing yarn from the front of the tail, thru the curl, and into the back, and then go back again. Hide ends in body.

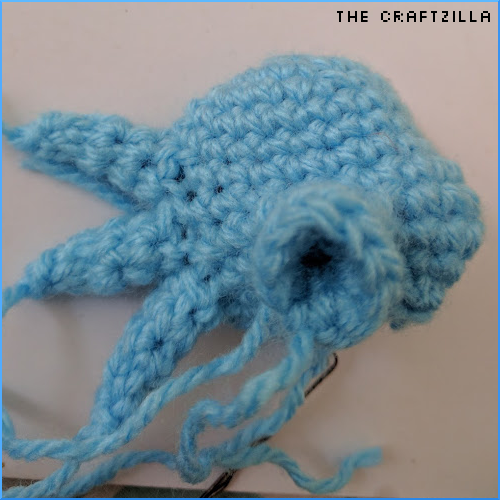
Head spikes
Six in baby blue in each ch3 space on sides of head

Round 1: Short version: sl st, sc in same st, sc 5
Long, explanation version: Go to the first ch 3 space/hole you made in round 7 of the head. reattach your yarn with a slip stitch to the first sc (I held horsea upside down and started from the bottom right corner). In that same stitch, you will sc, then sc into the next 2 sc you left open during round seven. Now sc into (not over!) the three chains. Now it's just like working a round.
R2-3: (Ignore sl st) Sc 6 times (6)
R4: Dec 3 times (3)
Fasten off, sew the opening closed, and hide the tail. Repeat for other 5 holes (not the one in the middle, that's the snout!)

Snout
One in baby blue
Go back to the ch 3 space/hole we made in the middle of the head during round 9. First round is the same as the head spikes.
Round 1: Sl st, sc in same stitch, sc 5 times (6)
R2: (ignore sl st) inc, sc 5 times (7)
R3: Inc, sc, inc, sc, inc, sc, inc (11)
Fasten off and weave in ends. You can put a tiny circle of black felt in the snout if desired.
Wings
Make two in light yellow
Round 1: 6 sc in mc
R2: Inc, hdc inc, dc inc, hdc inc, inc, sl st, fasten off (11)
Leave tail of yarn to sew onto back. Sew onto back one row beneath the neck and one stitch apart from each other.

Congrats, you're finished!
Because I used such a thin yarn, some gaps appeared around where I attached my head spikes. I used a yarn needle and some baby blue yarn to close any super noticeable gaps.
Horsea has now been added to your Pokedex! Please keep in mind that I have no pattern testers/proof readers other than myself, so please let me know if you have questions or find an error. Thanks!

The Craftzilla
No comments:
Post a Comment